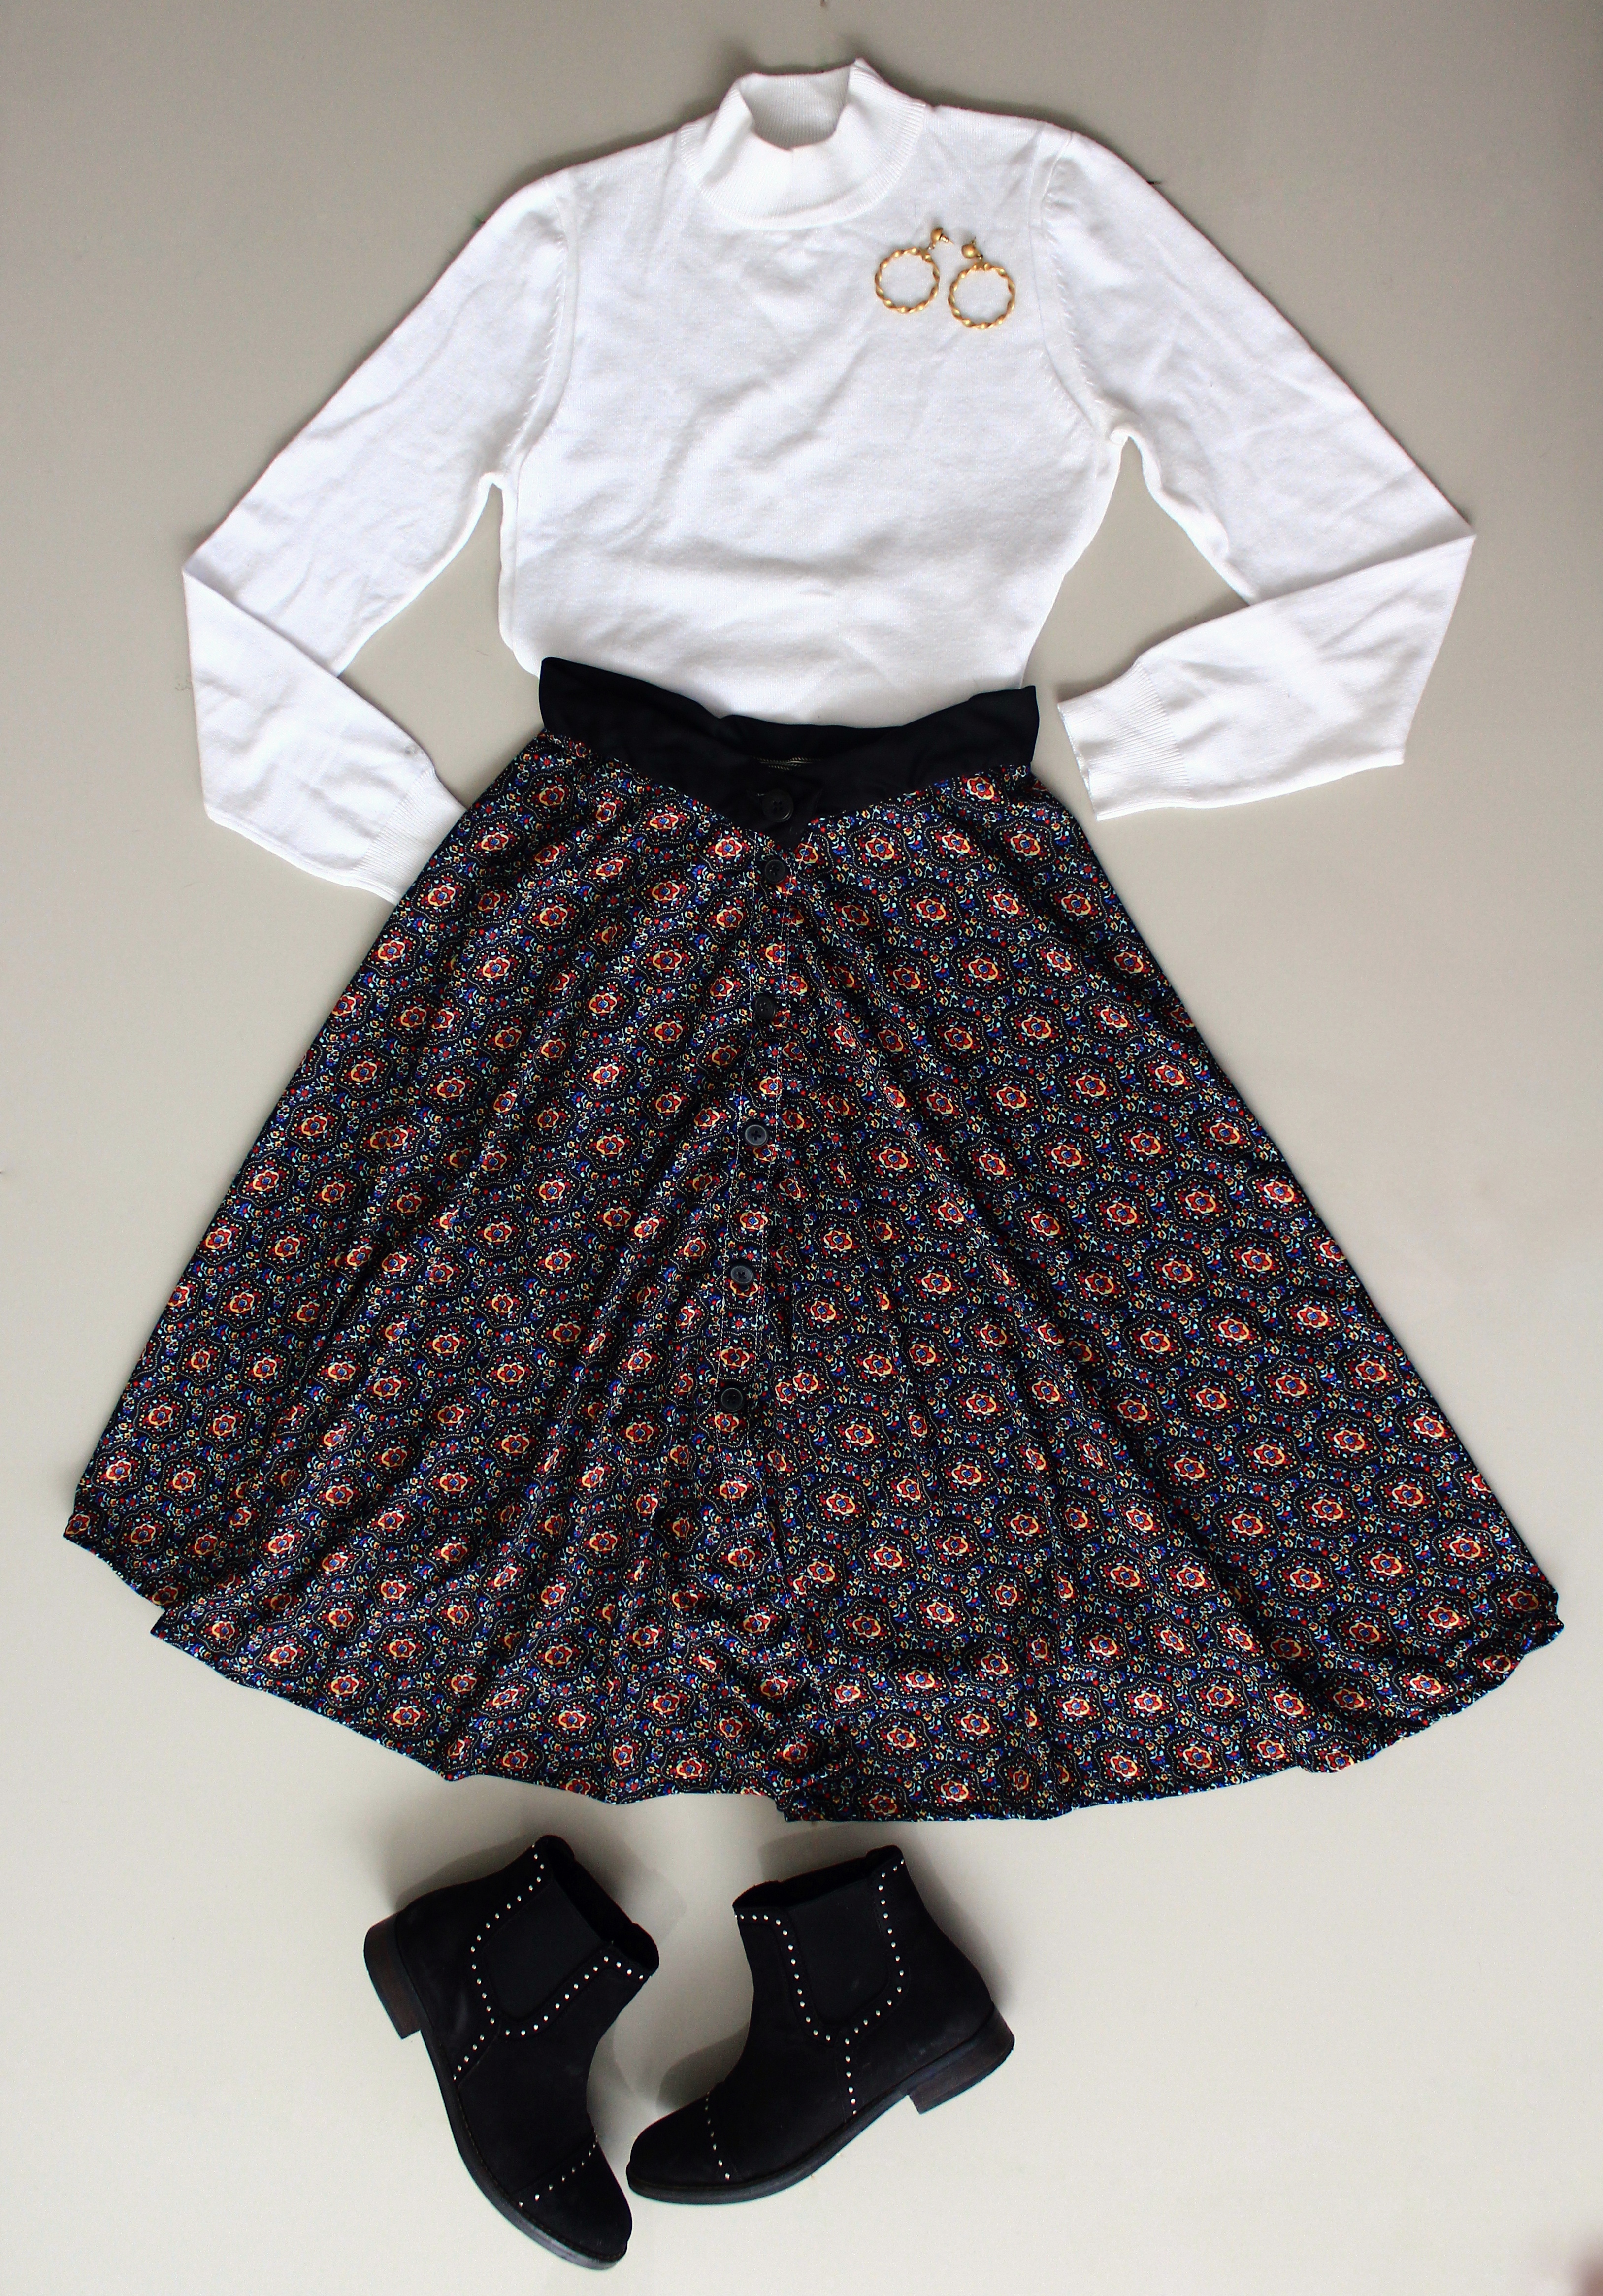
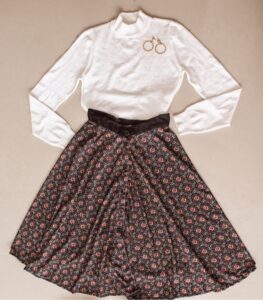
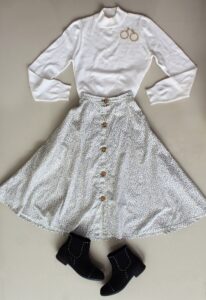
Timeless, classic, and feminine!
You’re going to fall in love with this skirt, I promise…
One day I was looking for inspiration on Pinterest and saw a gorgeous floral midi-length skirt, I immediately thought it would be a great project to try. And since I didn’t own any skirt like that I decided to make one myself. It’s simple and fast to sew, plus it looks gorgeous on so many outfits, and no matter the weather it can be worn.
Therefore I want to show you how to make your own midi skirt, which you’ll be able to personalize as you wish. That’s the beauty of #MeMade garments?! Made to your specific needs and wishes.
It’s very common to find this type of skirt in linen or in very thin materials, like organic cotton or silk. You can choose whatever you want to create that perfect skirt, from a printed fabric to solid colors. I recommend, like always a sustainable fabric option (organic cotton or linen) but you can use whatever adjusts to your budget.
I had this leftover floral fabric, which I’ll be using, but you can buy some from an ethical supplier or reuse what you already have at home like me.
LET YOUR CREATIVITY FLOW!
Some suppliers for sustainable fabrics we recommend are:
- BLACKBIRD fabrics
- GOOD FABRIC
- BAWN textiles
- SPOONFLOWER (sustainable and regular fabric)
Materials
- 2 meters of Fabric (look for a fabric with a wide edge, so the length of your skirt will fit, like1.50 mts or more.)
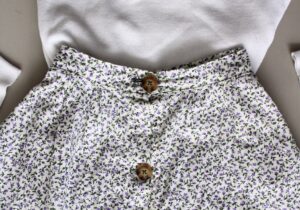
- 5-6 buttons
- Thread
- Measuring tape
- Fabric Scissors
- Pencil, clay, a piece of chalk, or a fabric marker
- Sewing Machine
*You can do it by hand, it will take longer, but it’s possible because there are not many steps to follow.
If your planning on getting new sewing supplies or maybe your getting them for the first time, we recommend you check MadamSew’s online shop. In there you’ll find everything you need, from scissors to seam rippers. Get your basic sewing tools right now!
Let’s get started!
Measurements we’ll need
- Waist (measure your waist at the thinnest point but don’t tighten the tape to your body, let it a little loose so the skirt won’t squish you)
- Skirt length (measure the length you’ll like it to be, from the waist down)
*Midi length is supposed to end between your ankle and your knee.
Other measurements to consider for the molds:
- Waistband width: 10 cm
- Waistband length: waist + 8 cm
- Winglet: 5 cm (width)
- Seam allowance of 1 cm
- Hem allowance 2 cm
You won’t need any type of paper to make the molds, we’ll do it directly in the fabric.
To begin tracing your skirt you’ll need to fold your fabric’s width in half. Place it like this, to achieve a 90º angle. This 90º will be the width of the skirt or the flare it will have, this is a half-circle skirt.
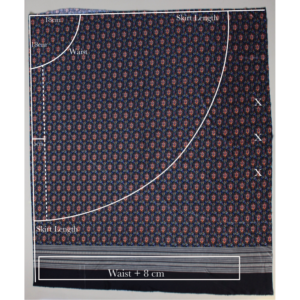
*The Xs means that’s where the fabric fold should be.
1. Trace the small curve. From the top left corner go down 18 cm, mark it with your pencil/chalk, and from the top left corner move to the right 18 cm and make a mark as well. Connect those marks with a curve. (You can make another one at the center, just measure 18 cm in a diagonal and mark). This line is for the waist. To make sure this will fit you, measure that curve line, multiply it X2, and compare it to your waist measurement.
For example, my waist measurement is 66 cm and the measure of the curve line is 80 cm, this last measure should be bigger, you’ll see why*. If it isn’t, add a few centimeters to the 18 cm mark to try to make the curve bigger, until the total is at least 10 cm bigger than your waist measurement.
2. From that curve line (waistline), add the measure of your wished skirt length, in my case is 70 cm. Add it to both sides and mark both points. Following the shape of the waistline, trace the second curve line.
3. Now, you’ll mark a 5 cm winglet/button band at the left side. *Also this is why it needs to be 10 cm larger than the waistline because it will need to include this winglet measure. This will save us time to make another operation of attaching a stripe there.
4. Finally, you’ll trace a rectangle with a width of 10 cm and a length of the measure of your Waist + 8 cm. This is going to be the waistband so it doesn’t need to be on fold, we just need one piece.
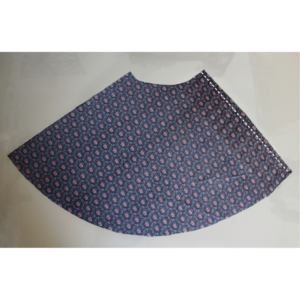
When all your pieces are marked, you can start cutting following the lines.

*These are the final pieces you should end up with. The strip looks a little curved but it is not, you should end up with a straight strip.
Then, it’s sewing time!
Step 1:
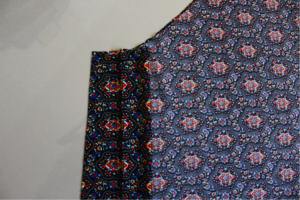
Start by joining the top parts facing both right sides of the fabric together. The right side is where the print is sharper. This seam is going to be the backside of the skirt. If your fabric allows it you can leave it unfinished but if you need it, use the zig-zag stitch to finish the edges. Mine allowed me to leave it like that.
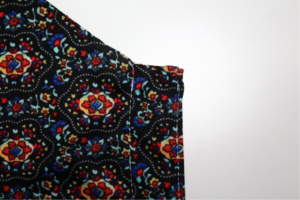
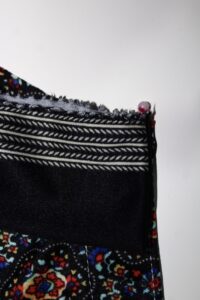
Fold the seam allowance to the wrong side and press. Then fold again 2.5 cm, dividing the winglet or button band in half, and sew it in place. You can add a parallel second topstitch to make sure it stays in shape. And repeat the same process on the other side (other winglet).
You should end up with this two stitches along the whole winglet.
Step 3:
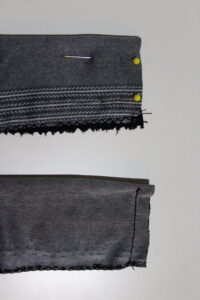
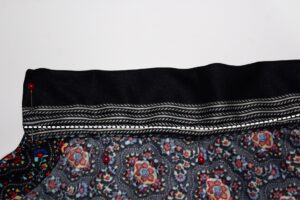
To prepare the waistband you’ll need to sew the edges, right sides together, like this…
Then, place the edge of the waistband with the edge of the skirt and pin it.
Sew one side of the waistband with the skirt, right sides together.
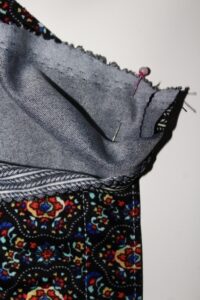
Then wrap the stitch you just made with the other side of the waistband and sew it there. This will leave the waistband in place. Follow the dotted line.
Step 4:
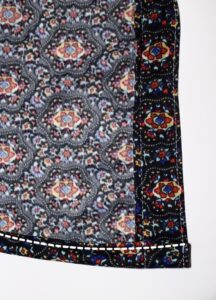
Hem the length of the skirt.
Step 5:
Finally, make the buttonholes on the right side, and attach the buttons on the left side. I recommend to make the buttonholes first so you can mark where the buttons will be. You can do this with your sewing machine, mine has an option to do buttonholes, but if your’s doesn’t have it there are a lot of tutorials on how to sew them by hand. And… we have a tutorial on another blog on how to sew a button correctly.

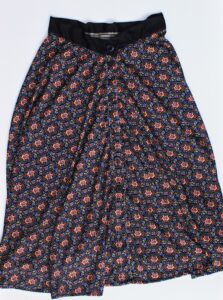

And that’s it! You have a timeless Midi skirt.
The only thing left for you is to try it on and style it as you wish, based on your personal style. Create outfits with what you already have in your wardrobe, there are so many ways to combine this skirt.
I love this kind of skirt so much I even made a second one. Take a look!

I would love to know about your creations! -Dani
Leave a Reply